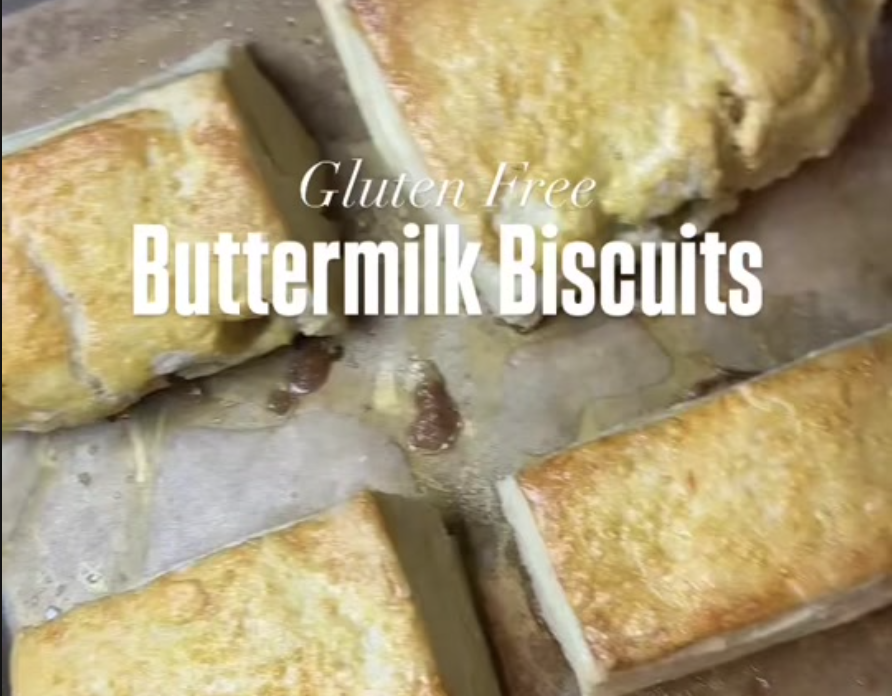
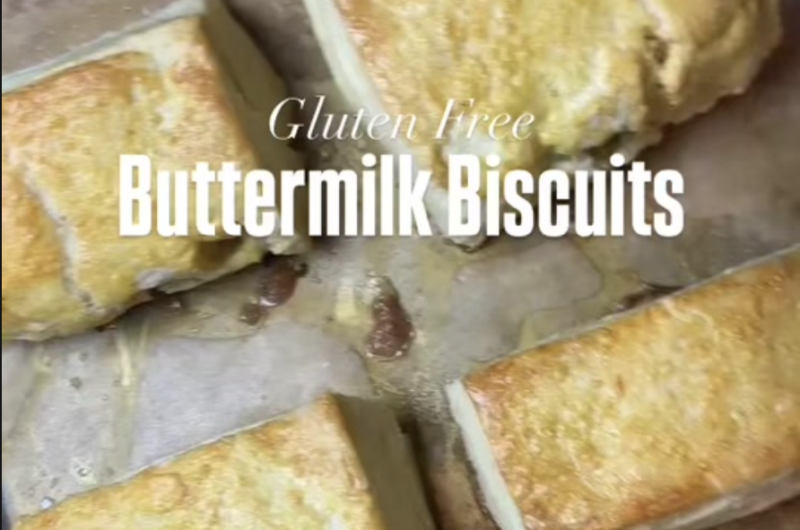
Gluten-Free Buttermilk Biscuits That’ll Fool Everyone
You know that moment when you set a basket of biscuits on the table and people lean in like they can smell the butter from across the room? That’s what I want for you here. These gluten-free buttermilk biscuits come out flaky, tall, and tender, the kind that make folks pause mid-bite.
And here’s the best part, they don’t taste “gluten-free.” Not even a little. They taste like the real deal. Warm, buttery, and just waiting for gravy, jam, or a swipe of melted butter.
Jump to RecipeWhy These Biscuits Get Such Big Reactions
I love serving these when I want to quietly surprise people. They look like classic biscuits. They pull apart in layers. They’ve got that golden top and soft center.
Most gluten-free baking wins on flavor but misses texture. These don’t. They hit all the things we want a biscuit to be.
A few reasons they feel so special:
- Flaky texture that breaks into layers
- Phenomenal flavor that tastes rich and buttery
- Zero “tell” that they’re gluten-free
I’ll say it plainly, no one will ever detect they’re gluten-free. That, I can promise.
The One Non-Negotiable: Very Cold Butter in Tiny Pieces
If you take one thing from me, take this. Use very cold butter in very little pieces. Cold butter is what creates those pockets in the dough, and those pockets become flaky layers once they hit the heat of the oven.
If the butter gets warm before baking, it blends in too much. That’s when biscuits turn more bready and less layered. Still tasty, just not the biscuit magic we’re after.
I like to cut the butter small so it spreads evenly through the dough. Little bits all over, not a few big chunks in one spot. Think “butter confetti,” not “butter boulders.”
How I Mix the Buttermilk Without Over-Wetting the Dough
This is where people get nervous, and I get it. Biscuit dough can go from perfect to too wet fast. My trick is simple: I don’t dump all the buttermilk in and hope for the best.
I mix the buttermilk in at least twice, sometimes three times, and I watch the dough as I go. The goal is to bring it together without making it soggy.
Here’s what that looks like in my kitchen:
- I add some buttermilk and mix gently.
- I add a little more and mix again.
- If it still needs it, I do a final small addition.
Slow additions give you control. You’re not trying to “beat” the dough into submission, you’re just coaxing it together.
And one more thing, don’t over-wet the mixture. If it looks like a thick batter, you’ve gone too far. Biscuit dough should look a bit shaggy and rough. That’s normal. That’s good.
Cutting Your Biscuits: Round, Rustic, or Totally Bizarre
Once the dough is ready, I cut into shapes. Sometimes classic rounds, sometimes whatever mood I’m in. Round or bizarre ones like I did.
This part is fun. It’s also a little sneaky helpful. If you’re new to gluten-free dough and you’re worried about perfection, odd shapes take the pressure off. Nobody expects a “perfect circle” when you lean into rustic.
I do try to keep thickness fairly even so they bake at the same rate. That’s the main thing. Same thickness means nobody’s biscuit is underbaked while the others are already crisp.
Egg Wash for That Golden Bakery Look
Right before baking, I brush on an egg wash. It’s a small step that makes a big difference. You get that shiny, golden top that makes people think you picked them up from a bakery.
It also helps the biscuits look finished. Not pale. Not dusty. Just glossy and inviting.
If you’ve ever baked gluten-free biscuits that tasted great but looked a little sad, this is one of the easiest fixes.
Baking and What You’ll See When They Come Out
Once they bake, you’ll know. The kitchen smells like butter and comfort, and the biscuits look like they’re ready to show off.
They come out flaky and phenomenal. The tops brown up, the layers separate, and the centers stay soft. This is the kind of biscuit you want to split open while it’s still steaming, then watch the butter melt into the layers like it belongs there (because it does).
Serving Ideas: Breakfast, Dinner, and Everything in Between
These are the biscuits I make when I want options. Because they work with everything.
Biscuits and gravy? Yes, please. That’s a full, cozy meal right there.
Biscuits and jam? Also yes. Sweet, simple, and honestly hard to stop eating.
I serve them with breakfast, and I serve them with dinner. Same pan, different vibe. They’re the kind of side that doesn’t feel like “just a side.”
A few easy ways I love to use them:
- Split and smother with gravy for a comfort plate
- Spread with jam for a quick treat
- Serve warm alongside dinner like you’ve been doing it forever
Oh my gosh, they’re so good.
Quick Step Recap So You Can Bake With Confidence
If you want the whole method in one glance, this is it:
- Start with very cold butter cut into tiny pieces.
- Add buttermilk in two to three rounds, mixing gently each time.
- Stop before it gets over-wet, shaggy is good.
- Cut into round or fun shapes, keep the thickness even.
- Brush with egg wash.
- Bake until they’re flaky and golden.
That’s the path to biscuits that people swear can’t be gluten-free.
Ready to Fool Your Guests?
If you’ve been missing that classic biscuit moment, this is your sign. Bake a batch, set them out, and watch what happens. The layers, the flavor, the soft pull-apart centers, it’s all there.
When you make them, tell me what you serve them with. Gravy? Jam? Dinner side? I want to hear it. And most of all, I want you to see people take that first bite and go quiet for a second, in the best way. Try it.
Gluten-Free Buttermilk Biscuits That’ll Fool Everyone
Course: Breakfast u0026amp; Brunch, Recipes4
servings30
minutes40
minutes300
kcalIngredients
Gluten free flour (all-purpose blend)
Very cold butter
Buttermilk
Egg (for egg wash)
Directions
- Start with very cold butter cut into tiny pieces.
- Add buttermilk in two to three rounds, mixing gently each time.
- Stop before it gets over-wet, shaggy is good.
- Cut into round or fun shapes, keep the thickness even.
- Brush with egg wash.
- Bake until they’re flaky and golden.